
How to Properly Apply Wrestling Tape
Are you tired of those pesky injuries slowing you down on the wrestling mat? If so, you’re not alone. Every wrestler knows that even the smallest sprain or strain can be a major setback. But fear not! In this blog post, we’re going to dive into the world of wrestling tape and show you how to properly apply it. Whether you’re a seasoned wrestler or just starting out, this guide will empower you with the knowledge and skills to give your body the support it needs to stay in the game. So let’s get started and get you back on the mat, stronger and more confident than ever before!
Understanding Wrestling Tape
Wrestling tape is an essential accessory for both amateur and professional wrestlers. It plays a crucial role in preventing injuries, providing support, and enhancing performance during matches and training sessions. If you’re new to the sport or looking to gain a better understanding of wrestling tape, this article will cover everything you need to know.
What is Wrestling Tape?
Wrestling tape, also known as athletic tape, is a self-adhesive, flexible tape designed specifically for use in wrestling. It is made from a combination of materials, including cotton, nylon, and adhesive, to provide maximum support and durability. The tape is typically available in rolls of various lengths and widths to accommodate different needs and preferences.
Primary Uses of Wrestling Tape
1. Injury Prevention
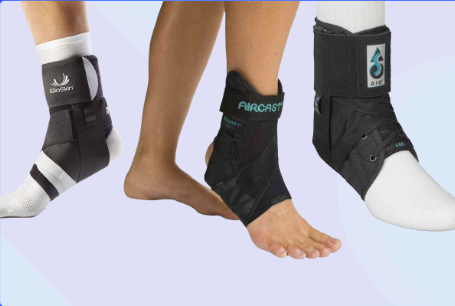
One of the primary uses of wrestling tape is to prevent injuries, particularly to the joints and muscles. It can be applied to areas that are prone to sprains, strains, or excessive movement, such as the ankles, wrists, and fingers. The tape helps stabilize these vulnerable areas, reducing the risk of injury during intense wrestling maneuvers.
2. Support and Stability
Wrestling tape is also used to provide support and stability to different parts of the body. It can be wrapped around joints, such as the knees or elbows, to offer additional reinforcement during high-impact movements. The tape acts as a supportive barrier, reducing stress on the joints and improving overall stability.
3. Grip Enhancement
Another significant use of wrestling tape is to enhance grip. Wrestlers often apply tape to their fingers or palms to improve their hold on their opponent’s body or the mat. The added grip can make a significant difference in executing various wrestling techniques effectively.
Types of Wrestling Tape
There are several types of wrestling tape available on the market, each with its specific features and benefits. Understanding the differences can help you choose the most suitable tape for your needs. Here are some common types:
1. Athletic Cloth Tape
Athletic cloth tape is a popular choice among wrestlers due to its versatility and reliable support. It has a fabric-like texture, providing excellent adhesion and flexibility. This type of tape is ideal for injury prevention and joint support.
2. Elastic Tape
Elastic tape, also known as kinesiology tape, is designed to stretch and move with the body. It offers a greater range of motion and flexibility while providing support and stability. Elastic tape is often used for dynamic movements and can be beneficial for wrestlers who require more mobility.
3. Finger Tape
Specifically designed for the fingers, finger tape is narrower in width and provides targeted support for this delicate area. It helps protect the joints and ligaments while allowing for better grip and control during wrestling.
Comparing Wrestling Tape Types
To help you understand the differences between the various types of wrestling tape, here’s a comparison table highlighting their key features:
| Type of Tape | Features |
|---|---|
| Athletic Cloth | – Fabric-like texture |
| – Reliable support | |
| – Ideal for injury prevention and joint support | |
| Elastic | – Stretches and moves with the body |
| – Provides support and stability | |
| – Offers greater range of motion and flexibility | |
| Finger | – Narrow width for targeted support |
| – Protects joints and ligaments | |
| – Improves grip and control |
Preparing for Tape Application
Before applying wrestling tape, it is important to properly prepare the area to ensure optimal adhesion and comfort. In this blog section, we will outline the necessary steps to take before applying tape, including cleaning and drying the area, as well as ensuring the skin is free from any lotions or oils. By following these steps, you can ensure that your tape application is effective and long-lasting.
Step 1: Clean the Area
Before applying tape, it is crucial to clean the area thoroughly. This will remove any dirt, sweat, or oils that could interfere with the tape’s ability to adhere to the skin. Use a mild soap or cleanser and gently wash the area, taking care not to scrub too harshly. Rinse with lukewarm water and pat dry with a clean towel.
Step 2: Dry the Area
Moisture can prevent tape from sticking properly, so it is important to ensure that the area is completely dry before applying tape. Use a clean towel to gently pat the area dry or allow it to air dry naturally. Avoid using any heat sources, such as hair dryers, as excessive heat can irritate the skin.
Step 3: Remove Lotions and Oils
To ensure optimal tape adhesion, it is important to remove any lotions, oils, or creams from the skin. These substances can create a barrier between the tape and the skin, reducing its effectiveness. Use a mild cleanser or alcohol-based wipe to remove any residual products from the area. Pay close attention to areas where lotions or oils are commonly applied, such as the elbows, knees, or ankles.
Step 4: Trim Hair if Necessary
If the area where you plan to apply tape is hairy, it may be necessary to trim the hair to ensure proper tape adhesion. Long hair can interfere with the tape’s ability to stick and may cause discomfort when removing the tape later. Use scissors or an electric trimmer to carefully trim the hair, taking care not to cut the skin.
Step 5: Apply Skin Prep
For individuals with sensitive or easily irritated skin, applying a skin prep solution can help protect the skin and enhance tape adhesion. Skin prep solutions create a barrier between the tape and the skin, reducing the risk of irritation and improving tape longevity. Simply apply the skin prep solution to the area, following the manufacturer’s instructions, and allow it to dry before applying tape.
Step 6: Consider Additional Pre-Taping Techniques
In some cases, additional pre-taping techniques may be beneficial to ensure optimal tape application. These techniques can include stretching or warming up the muscles, applying kinesiology tape to enhance blood flow and reduce muscle fatigue, or using underwrap to provide additional cushioning and protect the skin. Consider these techniques based on your specific needs and consult with a healthcare professional if necessary.
Remember, proper preparation is key to ensure effective tape application. By following these steps, you can maximize the benefits of wrestling tape and minimize the risk of discomfort or tape failure.
Key Points:
- Clean the area thoroughly before applying tape to remove dirt, sweat, and oils.
- Ensure the area is completely dry to promote tape adhesion.
- Remove lotions, oils, or creams from the skin to enhance tape effectiveness.
- Trim hair if necessary to prevent interference with tape adhesion.
- Consider using a skin prep solution for sensitive or easily irritated skin.
- Additional pre-taping techniques, such as stretching or using underwrap, may be beneficial in certain cases.
Remember, taking the time to properly prepare the area before applying tape will greatly improve its effectiveness and ensure a comfortable and secure fit. So, take these steps into consideration and get ready to experience the benefits of wrestling tape like never before!
Proper Tape Application Techniques
When it comes to sports and physical activities, ensuring proper support and stability is essential to prevent injuries and enhance performance. Wrestling, in particular, is a high-impact sport that places significant strain on the body. To maintain optimal performance and reduce the risk of injury, wrestlers often rely on taping techniques to provide additional support to joints and muscles. Here, we will guide you through the step-by-step process of applying wrestling tape correctly, covering techniques such as anchoring, tension, and overlap to ensure a secure and supportive taping job.
1. Gather the necessary materials
Before diving into the taping process, make sure you have all the required materials at hand. Here’s a list of essentials you’ll need:
- Wrestling tape: Look for a high-quality, durable tape specifically designed for sports activities. Brands like Johnson & Johnson Coach Sports Tape or Mueller Athletic Tape are popular choices among wrestlers.
- Scissors: Ensure you have a pair of sharp scissors to cut the tape cleanly and accurately.
- Pre-wrap: This thin, foam-like material is used to protect the skin before applying tape, preventing irritation and discomfort.
- Underwrap adhesive spray (optional): This spray can be used to increase the adherence of the pre-wrap to the skin, providing a better base for taping.
2. Prepare the area
Before starting the taping process, ensure the area you’re taping is clean and dry. Remove any dirt, oil, or sweat from the skin using a mild soap and water. Dry the area thoroughly to ensure optimal tape adherence.
3. Anchor the tape
Start by anchoring the tape securely. Begin with a strip of tape that is approximately double the length of the area you wish to tape. Apply one end of the tape firmly to the skin, making sure it sticks well. The anchor point should be stable and act as a foundation for the rest of the taping job.
4. Apply tension
Proper tension is crucial when applying tape. Too loose, and the taping won’t provide adequate support; too tight, and it may restrict movement and cause discomfort. Apply tension to the tape as you wrap it around the joint or muscle. Ensure the tension is consistent throughout the taping process, maintaining a secure and supportive fit.
5. Overlap for stability
To enhance the stability and support provided by the tape, overlap each subsequent strip by approximately half its width. This overlapping technique ensures that the tape adheres firmly and prevents gaps or weak spots in the taping job. Be mindful of the direction and angle of the overlap to maximize stability and prevent the tape from coming loose during activity.
Considerations and Tips
When it comes to the sport of wrestling, tape can be an essential tool in preventing and managing injuries. However, it’s important to use the proper taping methods and techniques to ensure maximum effectiveness. In this section, we will discuss important considerations and provide useful tips to help you apply wrestling tape correctly.
1. Taping Methods for Different Injuries and Body Parts
a. Sprained Ankle
- Start by applying an anchor strip around the middle of the foot, just above the ankle bone.
- Apply stirrup strips from the anchor strip around the foot and up both sides of the ankle.
- Use figure-eight strips to provide additional support and stability, crossing over the ankle in a diagonal pattern.
- Finish by applying a closing strip around the top of the ankle to secure the tape in place.
b. Wrist Injury
- Begin by wrapping a pre-wrap around the wrist to protect the skin.
- Apply a strip of tape around the wrist joint to provide stability.
- Use “X” strips to provide additional support, crossing over the wrist joint in a crisscross pattern.
- Finish by applying a closing strip to secure the tape in place.
c. Finger Injury
- Start by applying an anchor strip at the base of the finger.
- Apply “V” strips from the anchor strip to provide support and stability to the injured finger.
- Use a closing strip to secure the tape in place.
2. Tips to Enhance the Effectiveness of Wrestling Tape
a. Proper Preparation
- Ensure the skin is clean and dry before applying the tape to improve adhesion.
- Apply pre-wrap to protect the skin from irritation and promote better tape adherence.
b. Correct Tension
- Apply the tape with the right amount of tension. It should be tight enough to provide support but not so tight that it restricts blood flow or movement.
c. Smooth Application
- Smooth out any wrinkles or creases in the tape as you apply it to ensure a secure and comfortable fit.
d. Reapplication
- If the tape starts to loosen or loses its effectiveness during a match, it’s important to reapply it for continued support and injury prevention.
e. Choosing the Right Tape
- Consider using high-quality wrestling tape that is specifically designed for sports-related injuries. Brands like Mueller Sports Medicine or KT Tape offer reliable options that provide excellent support and durability.
f. Proper Removal
- When removing the tape, do it slowly and carefully to avoid causing any further discomfort or irritation to the skin.
By following these considerations and implementing these tips, you can ensure that your wrestling tape is applied correctly, providing the necessary support and protection for various injuries and body parts.
Remember, proper taping techniques can make a significant difference in preventing injuries and enhancing performance on the wrestling mat. So take the time to learn and practice these methods to keep yourself at your best during your wrestling journey.
Wrap it up: Final thoughts on applying wrestling tape correctly
In conclusion, this blog post has offered essential guidance on the proper application of wrestling tape. By implementing the techniques and suggestions discussed, individuals can enhance their support and stability in wrestling. It is advised to seek guidance from a qualified professional to master these techniques effectively.


I followed your instructions and the tape worked wonders in supporting my joints. Thanks for the helpful article!
You’re welcome! I’m glad the article was able to assist you. Wishing you continued success with your wrestling endeavors!
I prefer using cloth tape over elastic tape because it feels more secure. What are your thoughts on this?
The choice between cloth tape and elastic tape often comes down to personal preference. Both have their advantages, so it’s great that you found what works best for you!
I’ve experienced some irritation from the tape. Any tips for preventing this?
Irritation can occur due to various factors. One suggestion is to make sure your skin is clean and dry before applying the tape. You can also try using a hypoallergenic tape to minimize any potential reaction. Hope this helps!
I found that using adhesive spray before applying the tape helps it stick better. Anyone else tried this?
I’ve been having trouble with the tape peeling off during matches. Any recommendations on how to prevent this?
Peeling can be a common issue. Make sure to clean and dry the area before applying the tape. Additionally, using a pre-wrap under the tape can provide extra grip. Give it a try!
That’s an interesting suggestion! Adhesive spray can definitely enhance the tape’s adherence. Thanks for sharing!